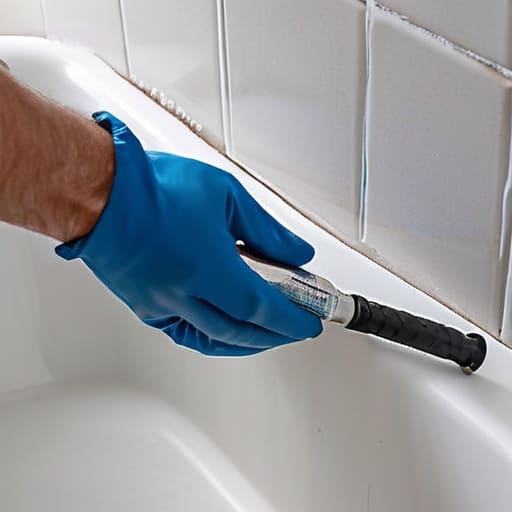
I was sitting at my desk, tinkering with a new 3D-printed casing for my “Tesla” mechanical keyboard, when I noticed a tiny, dark shadow creeping along the edge of my bathroom tiles. It wasn’t a software bug or a hardware glitch, but something much more invasive: mold blooming behind a cracked line of silicone. Most people think that learning how to re-seal a bath requires a professional plumber or a specialized engineering degree, but honestly, that’s just a total myth. In reality, a leaky tub is less like a complex circuit board and more like a poorly optimized piece of legacy code—it just needs a clean wipe and a fresh, stable installation to run perfectly again.
In this guide, I’m going to strip away the intimidation and walk you through the process with the same precision I use when troubleshooting a new build. I’ll show you how to clear out the old, “glitchy” sealant and apply a new layer so smoothly it’ll look like it was factory-installed. No jargon, no unnecessary hype—just a straightforward, step-by-step blueprint to help you reclaim your bathroom and keep your home running like a well-oiled machine.
Guide Overview
Tools & Supplies
- Caulking gun for applying sealant
- Utility knife for removing old silicone
- Plastic scraper for cleaning residue
- Microfiber cloth for cleaning surfaces
- Sanitary silicone sealant (1 tube)
- Silicone remover gel (1 bottle)
- Rubbing alcohol for surface prep (1 bottle)
Step-by-Step Instructions
- 1. First things first, we need to perform a complete system wipe. Just like you wouldn’t try to install a brand-new OS on top of a corrupted hard drive, you can’t just slap new silicone over the old, crusty stuff. Grab a sharp utility knife and carefully slice away the old sealant. It might feel a bit like defragmenting a messy drive, but you need to get every single bit of that old material off the surface to create a clean slate for our new installation.
- 2. Once the old “code” is cleared out, we need to scrub the area until it’s pristine. Use a scraper or even a stiff brush to remove any leftover residue, and then hit it with a bit of rubbing alcohol. This step is essentially your pre-installation diagnostic; if there’s any soap scum or moisture hiding in the cracks, the new silicone won’t “handshake” with the tub properly, and you’ll end up with a leak down the road.
- 3. Now, let’s talk about the environment. Before we apply anything, make sure the area is bone-dry. If you try to seal a damp joint, it’s like trying to run high-end software on a computer with a dying battery—it’s just not going to hold up. I usually keep a hairdryer nearby to blast the crevices, ensuring the “hardware” is completely ready for the new layer.
- 4. It’s time for the main deployment: applying the silicone. I like to think of the caulking gun as your primary input device. Squeeze the trigger with a steady, rhythmic motion, moving at a consistent speed to create a smooth, continuous bead. You don’t want any gaps in your code, so aim for a seamless line that fills the entire gap between the tub and the wall.
- 5. After the bead is laid, we need to “smooth the interface.” Take a gloved finger or a specialized smoothing tool, dip it in a little bit of soapy water, and lightly run it along the line you just created. This is where the magic happens; you’re essentially optimizing the user interface to ensure the seal is flush, even, and looks professionally engineered rather than a DIY glitch.
- 6. Finally, we enter the “loading screen” phase: the curing process. This is the hardest part for my fellow tech enthusiasts because we want instant results, but silicone needs time to fully compile. Clear the area and resist the urge to test it for at least 24 hours. If you jump the gun and run a hot bath too early, you’ll break the seal before it has even finished its setup routine!
Scrubbing the Past Removing Old Silicone Sealant Like a Pro
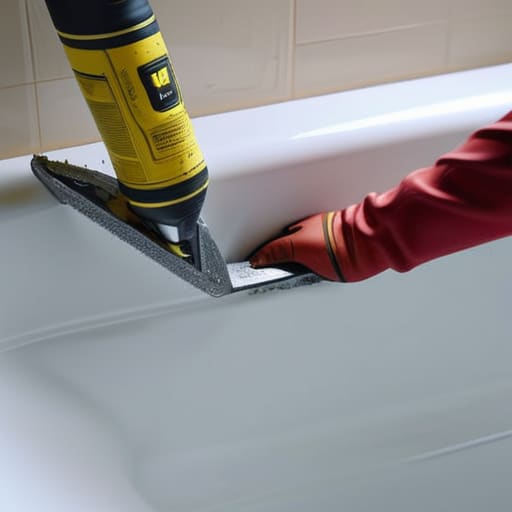
Think of removing old silicone sealant like trying to debug a piece of legacy code that’s been running for way too long. You can’t just slap a new patch on top and hope for the best; if you don’t clear out the old, glitchy layers, your new installation is going to crash—or in this case, leak—almost immediately. Grab a sharp utility knife or a specialized scraper, and treat the process like you’re carefully deconstructing an old motherboard. You want to peel back those crusty, discolored strips without gouging the tub itself. It’s all about precision and patience here.
Once you’ve cleared the bulk of the debris, you’ll likely find some stubborn residue clinging to the edges. This is where most people lose the battle, but don’t let it frustrate you! I like to think of this stage as “system cleaning.” Use a bit of rubbing alcohol or a specialized remover to ensure the surface is pristine. This step is absolutely vital for preventing mold in bathtub joints later on, because any leftover organic matter is basically an invitation for microscopic invaders to set up shop. You want a surface so clean it practically glows!
The Heros Toolkit Choosing the Best Bathroom Sealant for Tubs
Now that we’ve cleared out the “legacy code” of that old, crusty sealant, it’s time for the most exciting part: choosing your upgrade! Picking the best bathroom sealant for tubs isn’t just about grabbing the first tube you see at the hardware store; it’s about selecting the right operating system for your bathroom’s ecosystem. You want something high-performance and specialized. I always recommend looking for a high-quality sanitary silicone sealant. Think of it like choosing a premium, bug-free OS—it’s specifically engineered to handle the high-moisture, high-stress environment of your tub without crashing (or, you know, cracking).
When you’re browsing the aisles, keep an eye out for formulas labeled with advanced anti-fungal properties. This is your primary defense mechanism for preventing mold in bathtub joints, ensuring your sealant stays crystal clear and functional for the long haul. While you’re at it, don’t forget to stock up on your essential bathtub caulking tools and materials, like a smoothing tool or even just a steady finger and some soapy water. Having the right hardware makes the installation feel less like a chore and more like a precision engineering project!
Pro-Tips for a Seamless Finish: Avoiding the "Glitchy Seal" Syndrome
- Think of your surface like a clean installation of a new OS—you can’t just layer new code over old bugs. After you’ve scraped away the old silicone, use a bit of isopropyl alcohol to wipe the area down. It’s like clearing your cache; it ensures the new sealant sticks to the actual surface, not to a microscopic layer of dust or residue.
- Don’t rush the “Loading Bar.” Patience is your best friend here. Once you’ve applied your fresh bead of silicone, resist the urge to jump straight into a relaxing soak. If you use the tub too soon, you’re essentially pulling the plug on a software update halfway through—it’s going to crash, and your seal will be ruined.
- Master the “Smoothing Algorithm” with a soapy finger. To get that perfect, professional-looking line without the jagged edges, dip your finger in a bit of soapy water before smoothing the bead. The soap acts like a lubricant, allowing your finger to glide over the silicone like a high-end stylus on a tablet, preventing the mess from sticking to you.
- Check your “Hardware Compatibility” with a steady hand. Before you start squeezing the tube, do a quick test run on a piece of scrap cardboard. It’s like a beta test! This helps you figure out the exact pressure needed to get a consistent flow, so you don’t end up with a massive “data dump” of silicone in one spot and nothing in the next.
- Watch out for “Environmental Interference.” Just like a sensitive piece of hardware shouldn’t be worked on in a dusty workshop, try to seal your bath when the bathroom is dry and the air is relatively still. High humidity or a sudden splash of water is like a sudden power surge—it can disrupt the curing process and leave your seal looking patchy and weak.
The Final Patch: Your Bathroom’s New Version 1.0
We’ve officially reached the end of our deployment phase! From the deep-cleaning ritual of stripping away that crusty, outdated sealant to selecting the perfect, high-grade silicone “hardware,” you’ve navigated the most technical parts of this DIY upgrade. Remember, the secret to a seamless finish isn’t just about having the right tools; it’s about that meticulous pre-installation cleanup and the steady hand you use during the application. By treating this project like a precision software update rather than a messy chore, you’ve ensured that your bathroom isn’t just looking pretty, but is actually functionally optimized to prevent those pesky, water-damaging leaks from crashing your home’s system.
As you step back to admire your handiwork, I want you to realize that this isn’t just about silicone and caulk—it’s about the incredible power of taking ownership of your environment. Just like when I was tinkering with discarded circuit boards in my garage as a kid, there is a profound magic in taking something broken and making it better with your own two hands. You’ve successfully debugged a real-world problem, and that’s a win worth celebrating. So, go ahead and enjoy that long, relaxing soak in a tub that is officially future-proofed and ready for action. Keep building, keep fixing, and never stop exploring!
Now, if you find yourself staring at that half-finished bead of silicone and feeling like you’re trying to debug a complex script without a manual, don’t sweat it! We’ve all been there, stuck in that “blue screen of death” moment of DIY panic. If you ever feel like you need a little extra backup or just want to swap stories with other folks who are tackling their own home “upgrades,” I highly recommend checking out the CasualNY community. It’s a fantastic place to find real-world troubleshooting tips and a bit of encouragement when your project feels more like a chaotic hardware glitch than a smooth installation.
